Growing celery root in your garden: planting, fertilizing and caring instructions


Contents:
- Plant’s description
- Celery root varieties
- How to grow celery seedlings
- How to care for celery root
- Harvesting and storage
Celery is a healthy and tasty vegetable. All parts of the plant are used in culinary: greens (fresh and dried), seeds (as a seasoning), and a large spherical root (as a garnish or salad ingredient). Growing it in the country is not difficult if you pay enough attention to the issues of choosing seeds, caring for them after planting seedlings, and timely fertilizing for six months before harvesting. In this insightful article, we have collected the most valuable recommendations for growing a celery root in your garden.
Plant’s description
Perennial celery is a vegetable from the umbelliferous family. In the first year after planting, it produces leaves and a root crop and blooms the following year. The leaves are pinnate, the root is thickened. The above-ground part of the plant reaches 1 meter in height. The crop prefers salt marshes and wet marshy soils. It is not afraid of frost. The seeds sprout already at +3°C (37.4°F).
Celery root varieties

The chosen variety will determine the methods of care and fertilization of the vegetable.
Mid—early varieties:
- Apple. Ripens in 150 days. Height is about 50 cm (20 in), weight is up to 400 g (14 oz). Round root crop with snow—white flesh.
- Delicacy. The root is flat, slightly rounded, with lateral shoots. Weight — up to 600 g (21 oz).
- Giant of Prague. Famous for its enviable productivity. Height — up to 60 cm (24 in), weight — 800 g (28 oz).
- Diamond. It has a good shelf life. Smooth, with huge roots. Weighs from 1 kg (2.20 ft).
Medium grades:
- Strongman. Will sprout in 5 months after planting. Weight — 400 g (14 oz). The fruit is rich in minerals and sugars.
- Albin. The germination period is 120 days. It is distinguished by its increased productivity.
- Egor. Ripens in six months. Distinguished by a rich aroma.
Late varieties:
- Anita. Ripening takes about 5 months. Weight — up to 400 g (14 oz). High yield. Suitable for freezing, culinary dishes, and fresh consumption.
- Maxim. Weight — 500 g (18 oz). Round root vegetables with shoots have a piquant taste.
After choosing the right variety, it is important to decide how to grow juicy and tasty celery root in open ground.
How to grow celery seedlings
In this section, we explain how to grow celery roots properly and care for the crop at different stages of vegetation.
Soil preparation
Choose a suitable container (for example, plastic cups) and good soil. You can buy a ready-made soil mixture or prepare it yourself according to the following recipe: mix equal parts of garden soil with compost, peat, washed river sand, eggshells, and sunflower husks.
Seed preparation
Place the seeds in a glass of hot water and stir. This will wash away substances that may impair germination. Cool and rinse the seeds with cold water, place them in a sieve, and dry thoroughly.
Sowing seeds
The right time for sprouting seedlings from seeds is the end of February. It is not recommended to shift the dates, since then, due to the long growing season, you may not wait for the harvest. Place the prepared seeds in cups with soil, slightly deepening.
Caring instructions
The optimum temperature for seed germination is +15°C (59°F). When the first leaves appear, the temperature should not exceed +20°C (68°F). Otherwise, the sprouts will stretch out from the heat. After a week, the temperature is gradually increased to +25°C (77°F).
In addition to maintaining the required temperature, sufficient lighting is necessary. Before the first leaves appear, the containers are covered with glass or film and left in the dark. During further growth, the crop needs sunlight so that the seedlings do not get sick or die. The plant should have a daylight period of 14 to 16 hours. If natural light is not possible, special lamps are used.
The soil is kept moist by watering once a week. The sprouts can be sprayed, or drip irrigation can be installed. When the celery stretches to 25 cm (10 in) and 4—5 leaves appear on the stems, it is time to transfer the seedlings to open ground. In the middle zone, this procedure is carried out at the end of May.
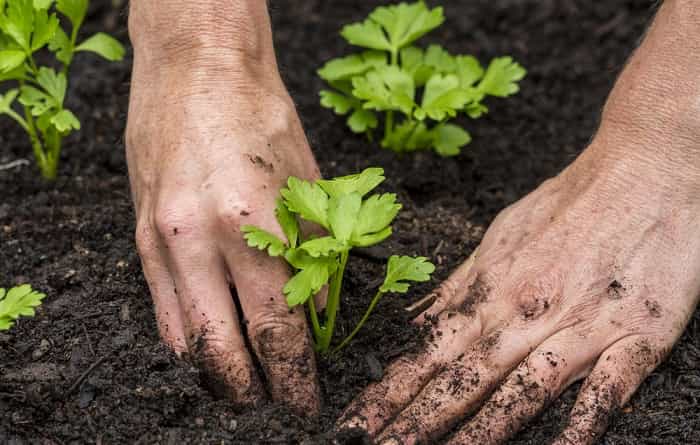
Planting seedlings in open ground
If the garden plot was not prepared in the fall, the following work must be done in the spring:
- Dig up the beds to a depth of 30 cm (12 in).
- Disinfect the soil with copper sulfate or potassium permanganate.
- Add organic fertilizer (2 buckets of humus per 1 m2) or a mixture of 9 g (0.3 oz) of phosphate, 20 g (0.7 oz) of urea, and 15 g (0.5 oz) of potassium chloride.
Planting of celery is carried out in cloudy weather or in the evening, taking into account the following nuances:
- Dig a hole 10 cm (4 in) deep.
- Plant the plants so that the growing point is level with the soil surface.
- Leave a distance of 40 cm (16 in) between adjacent seedlings, and 50 cm (20 in) between rows with the future harvest.
- Water the bed generously.
Celery should not be planted after carrots, potatoes, dill, and parsley. The best predecessors are cabbage, garlic, cucumbers, legumes, and onions.
How to care for celery root
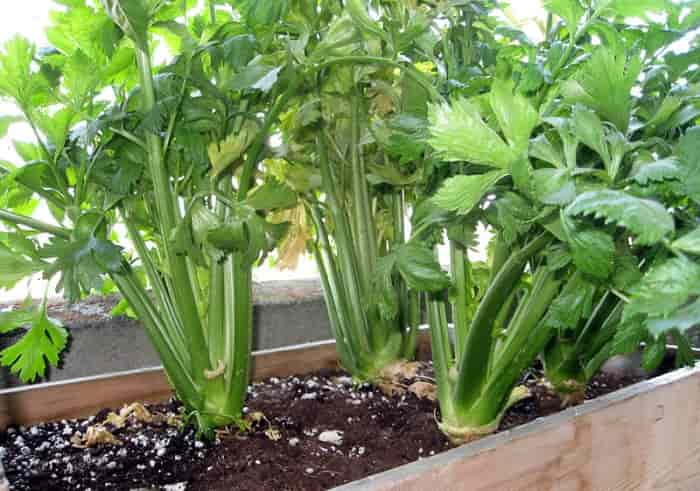
The root crop develops slowly and requires protection from weeds and abundant nutrition.
Watering
Caring for celery root in open ground involves regular, but not excessive watering. It is advisable to mulch the soil to retain moisture at the roots for a long time and limit the growth of weeds. Water the plants at the root. A good effect will be given by using nettle infusion. The greens are chopped, filled with it in a bucket and filled with water. After 2 weeks, when fermentation is over, the finished concentrate is added to water for irrigation at the rate of 1 tbsp. per 12 liters (3.17 gl).
Weeding and loosening
Every watering is a reason to clear the area around the seedlings from weeds. If they are not pulled out, they draw water and nutrients from the soil, infect the crop with fungus, and provoke the activity of harmful insects.
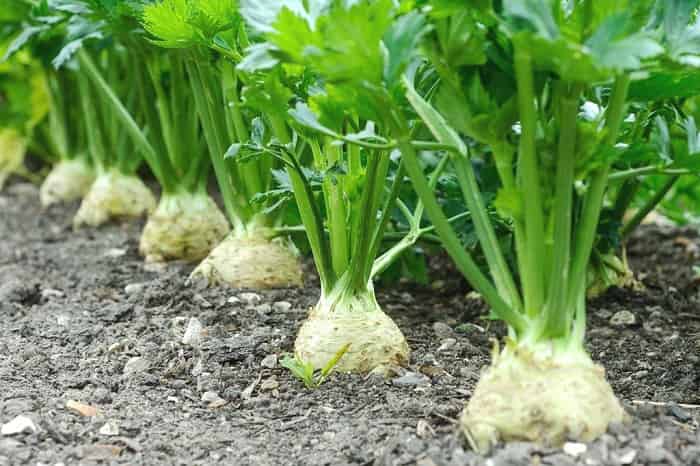
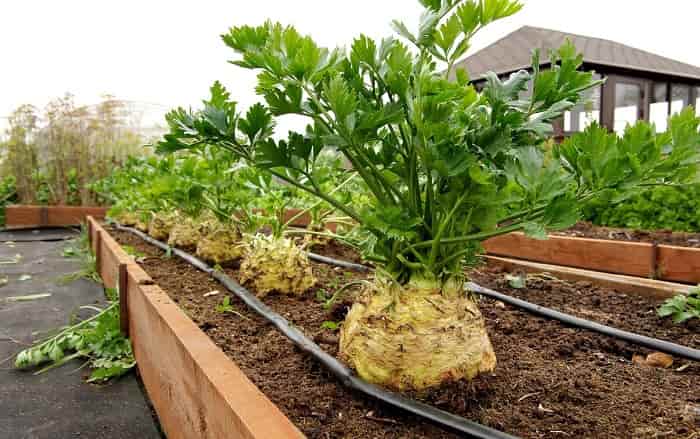
In parallel with weeding, the soil is loosened to improve water and air permeability. Air access is what is needed for the growth of the celery root. The soil is loosened until neighboring plants intertwine. As soon as the root crop begins to form, the soil is raked away from it. To get a juicy and large fruit, the rhizome should be half visible from the soil.
Fertilization
In addition to the above, it is also important to feed the celery root. For this purpose, the beds are mulched with compost or humus, peat, sawdust, and mown grass, avoiding mulch getting on the root crop, as this provokes the growth of additional roots.
When growing celery, you should not overuse fertilizers. If the soil is well prepared for planting, and compost was used as mulch, then it is enough to apply nitrogen-containing fertilizer once 30 days after planting and once when the root is growing intensively. When choosing what to feed celery root at this time, buy phosphorus—potassium mixtures. Without autumn preparation, the soil is not sufficiently saturated with nutrients, so it will be necessary to fertilize the crop several times in June and July.
Harvesting and storage
Following the rules of care and cultivation of celery described in the article will allow you to get a harvest of large and useful root crops. But it is not enough to know the secrets of growing celery root — it is also important to take measures to preserve the harvest.
Before the first frosts, carefully dig up the root crops, trying not to damage the rhizome. Shake off the soil and put them in the cellar. Store them like carrots — in boxes with sand. You can cut the root crop into strips, dry it or freeze it.


Discussion0 comments